
Why Measuring Tapes Have a Loose Tip — And Why It Matters
Measuring tapes are essential tools found in homes, workshops, and construction sites worldwide. Professionals and DIYers alike rely on them daily. But many users notice something odd: the metal tip at the end of the tape feels loose.
At first glance, it seems like a defect. However, this “looseness” is entirely intentional—and it plays a vital role in accurate measuring.
The Loose Tip Isn’t a Flaw—It’s Smart Engineering
When people see the metal tip move or wobble, they often think it’s broken. Some try to fix it, unaware they’re damaging a key feature.
This common misconception stems from not understanding the tip’s purpose. In reality, that small bit of movement ensures every measurement—inside or outside—is accurate.
How Measuring Tapes Work
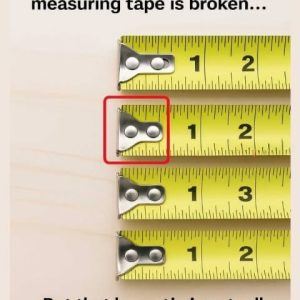
A measuring tape combines simple mechanics with clever design. It features a flexible metal blade marked with precise units. At the end sits a small metal hook—the loose tip.
This tip slides about 1/16 inch (1.5 mm) to account for its own thickness. That means you can take both inside and outside measurements without doing any math or adjustments.
Why the Tip Moves
-
Measuring Outside Dimensions: When you hook the tip over an edge, it pushes in. The tip’s thickness is subtracted from the reading.
-
Measuring Inside Dimensions: When you press the tape against an inner surface, the tip pulls out. Its thickness is automatically added to the measurement.
This tiny movement ensures accuracy no matter how you measure.
Key Benefits of the Loose Tip Feature
1. Accurate Measurements Every Time
The sliding hook eliminates guesswork. You don’t have to manually account for the tip’s size—the tape does it for you.
2. Versatility for Any Job
Whether you’re framing a house, sewing curtains, or measuring furniture, the loose tip adapts to your needs.
3. Faster Workflows
You can measure quickly and confidently. There’s no need to double-check or compensate—just measure and go.
4. Fewer Mistakes, Less Stress
Beginners and experts alike benefit from the simplicity. You can trust the reading without second-guessing.
How to Use a Tape with a Loose Tip
1. Understand the Mechanism
The tip moves for a reason. Test it by gently sliding it in and out. It should shift about 1/16 inch.
2. Prep Your Tools and Surface
Clean the tape. Check for damage. Make sure the surface is flat and stable.
3. For Outside Measurements
Hook the tip on the edge of the object. Push it in firmly, extend the tape, and read the measurement. The tip’s movement adjusts the result automatically.
4. For Inside Measurements
Place the tip inside the space. Pull the tape so the hook fully extends. Add the tape case’s length (usually marked on the side) if needed.
5. Double-Check Alignment
Make sure the tip is in the correct position—pushed in for outside, pulled out for inside. Keep the tape straight and taut.
6. Maintain Your Tape
After use, wipe the tape clean. Inspect the tip and rivets for wear or damage. Store it in a dry place to prevent rust or stiffness.
Small Feature, Big Impact
The loose tip isn’t a defect—it’s a brilliant solution to a real-world problem. Once you understand its purpose, you’ll appreciate just how cleverly designed your measuring tape truly is.
So, the next time you use one, remember: that tiny wobble is what makes your measurements so accurate.